Confession: At my worst, I have been a willy-nilly sander. At best, a guilty, unsure sander, not sure where to start, or with what grit, at what point in the process. I mean: do I have to sand through EVERY grit on a piece? Do I start with 100 grit? Do I stop at 320? Where do I apply stain or a topcoat? Do I sand after every finish application? What grit? How hard? Do I hand sand or use a mechanical sander? So many questions. While I’ve essentially claimed Farm Boy’s orbital sander as my own and have used it to sand down many a piece, with generally good results, I’ve still been unsure about my heretofore seemingly willy-nilly method.
As I strive for more perfect finishes—think glossy, lacquered pieces that show EVERY flaw—I’ve made it a point to research how to sand effectively in ways that compliment my hard work and make for a flawless (as possible) finish. While I certainly don’t claim to have unlocked all the sanding secrets of the world, here’s what I’ve found in the course of my research. (Skip to the end for a list of resources consulted in researching this post.)
Understand the sanding process
According to Jewitt in Refinishing Made Simple, it’s paramount to understand that “You level the surface with coarse grits, then move on the to finer grits to smooth the surface…the general idea is to work the surface with the sandpaper until the marks are removed and the surface is level. Then switch to a higher grit and sand until the (deeper) scratches are removed” (66).
Makes sense. One works through the grits in sequence in order to remove the marks left by the coarser grain.
Understand the sanding grits and their purposes
Coarse // 80 // Sanding bare wood to level and shape it (Unless you really want to do some wood-shaping, you probably don’t need buy this grit)
Medium // 100, 120 // Sanding to further shape the wood and minimize dings, dents, etc. (I have some 120 on hand almost all the time)
Medium Fine to Fine // 150, 180, 220 // Sanding bare wood to prepare it for stain or a topcoat* and ** (I use these grits quite extensively)
*Again, please note that these applications and recommendations vary from woodworker to woodworker (see Bob Flexner’s article)
**My (non-professional recommendations!) in purchasing sandpaper for furniture refinishing/restoration would be to purchase grits ranging from 120-220; you’ll use these grits to prepare the wood for stain and a topcoat.
Understand your sanding goals
If you want to level wood, e.g., remove all the dents, dings, etc., on furniture you’ll want to start with 100 grit and work up from there. I’ve found that when I use anything lower/coarser on an orbital sander, the coarse grit leaves swirl marks in the wood that are really difficult to remove in subsequent sandings—Flexner calls them “squigglies.” I made this mistake on a tabletop I refinished (thankfully, the table was mine and is currently in need of a refinish again, due to two artistic kids who love to make and paint stuff!) While I sanded the top with higher grits, I had a heck of a time removing the swirls—you can still see them, in fact,–and the dark stain settled into the swirl marks, accentuating them even further. Jeff Jewitt, in his superb text Refinishing Made Simple, makes a similar point, noting that most furniture refinishers don’t use a grit lower than 100 because they don’t need to.
Due the “squigglies,” I’m personally not a fan of removing finish from wood with a sander. Mostly from the standpoint that I’m nearly certain that I’ll burn through veneer (particularly on the edges of a piece) or create gouges, or other irregularities that will prove difficult to remedy or remove. Hence, I prefer to strip wood with a chemical stripper, like Citristrip and sometimes, if I want to remove a difficult finish more easily, a harsher stripper like Bix.
If the piece you’re working on doesn’t have large dents and dings, or if you’re okay with leaving them as part of the piece, start at 120 or 150 grit. The grit progression would then be as follows: 120, 150, 180, and 220. Interestingly, in researching this woodworking question of mine, there was not a clear consensus among finishing experts on what grit to start with, if one needed to continue through all the grits consecutively, or which grit to end with before one applied a stain or topcoat. Some recommended stopping at 150 grit. Some recommended stopping at 180 grit.
And while this information seems counter-productive, in the end I actually felt better. Perhaps my sanding wasn’t so willy-nilly after all. Bob Flexner, another widely recognized finishing expert notes in his article “Rules for Sanding Wood” that “There’s also no fixed rule for how to progress through the grits. Sanding is very personal…You’ll have to learn by experience what works best for you.”
However, when you’re standing in the aisle at the DIY store, or ready to pull the trigger on some sweet sanding materials online, how to to know which grit to buy?? Here are the general principles that I gathered from the extensive reading that I did.
Understand your wood and your desired final finish
When trying to determine where to begin with your sanding, with which grit, it’s good to know what type of wood you’re sanding and finishing, as different woods take stains differently. What’s more, the grit you sand with also influences how the wood will take stain. For instance, the higher the grit, the lighter the stain will be. As a rule of thumb, there’s no need to sand past 220 for bare wood you plan to stain; depending how much stain you want the wood to absorb, you can even use a lower grit (say 150 grit, as an example) for greater stain absorption.
I know that I’ve sanded waaaaay more than I’ve needed to in the past, and with too high grit (over 220) and that’s actually impeded my sanding goals and final finish. Now I know! (and you do too!)
When and how to hand sand (with a backer and without a backer)
Honestly, most of the time I bust out Farm Boy’s (though essentially mine!) random-orbital sander and use it on drawer fronts and dresser tops and it works well. However, sometimes it’s necessary to hand sand. Again, here’s what I’ve found in my research:
Hand sanding, without a block, is only advisable when you’re sanding curves or detail work. Without the block, the pressure from your hand is uneven, creating small depressions on flat surfaces (like dresser tops) that are visible when backlit. Again, I’ve made this mistake as well, sanding with sandpaper without some sort of backer (either a block of wood or a rubber sanding block), and have created these slight ridges on flat surfaces. Doh.
Hand sanding, with a block, is useful when sanding between coats of finish—I rarely if ever, use the orbital sander to sand between coats of paint or lacquer. Honestly, I prefer the control hand sanding provides and if it saves me from having to reapply the paint or stain, because I burned through it in my over-zealous orbital sanding, then I’ve actually saved myself time. Handing sanding is also recommended (this was something l learned in the course of my research!) after the last orbital sanding if one plans to apply a stain to the wood. Following the last orbital sanding with a hand sanding (in the direction of the grain, OF COURSE!) minimizes the “squiggilies” sometimes created by the orbital sander. This is a practice I plan to implement on future projects.
When and how to mechanically sand
As I mentioned above, I, like many others I’m sure, rely heavily on the random orbital sander to sand well, efficiently, and consistently. For the most part, it’s my go-to preparation tool for preparing wood for either primer or stain. However, it’s not a tool that I use for sanding between coats or for stripping wood. Below, some principles for effective sanding:
You must do let the sander do the work for you. I repeat: let the sander do the work for you and avoid the temptation to press down on sander, thinking that you’ll finish sanding more quickly. You’ll actually do the opposite.
Be sure to start at the appropriate grit, and work through the grits as needed–(see above for more on this).
Toss out the sandpaper when it’s done. As a self-described thrifty girl, it’s hard to do this sometimes, but if you don’t toss the sandpaper the build-up on the sandpaper actually damages your sanded surface, creating gouges. Not worth it!
Invest in good quality sandpaper. All sandpapers are not created equal and the cheaper papers “load up” much more quickly than the more expensive ones. In the end, buying the more the expensive product actually saves you money and allows you to produce a superior surface.
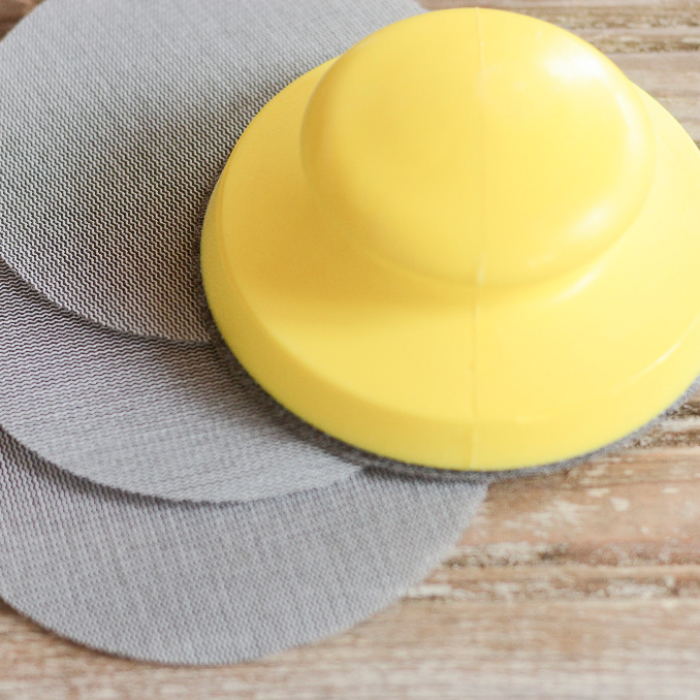
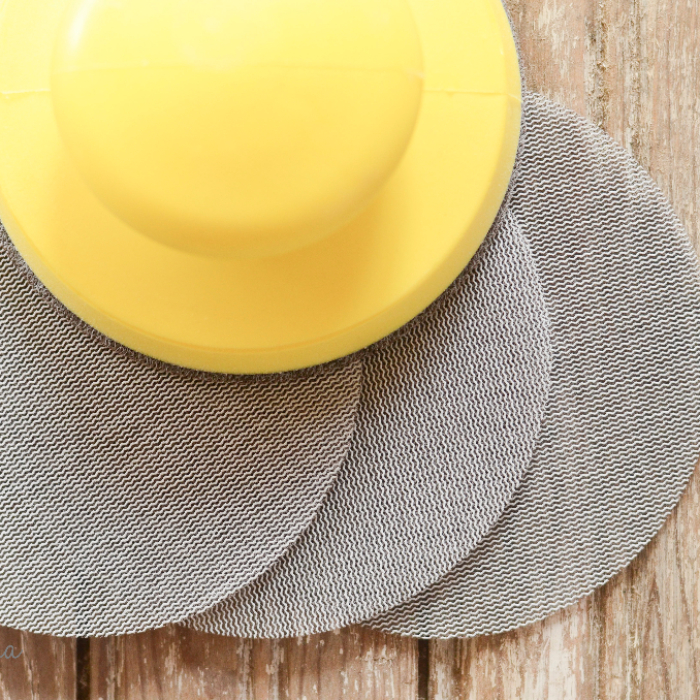
I’ve recently started using mesh backed sanding discs from Mirka (made in Finland!), and while they’re not cheap, they load up much less quickly than other types of discs, work well for wet sanding, and last much longer than other papers, given that you can removed the “corns” from the mesh.
My sanding tools
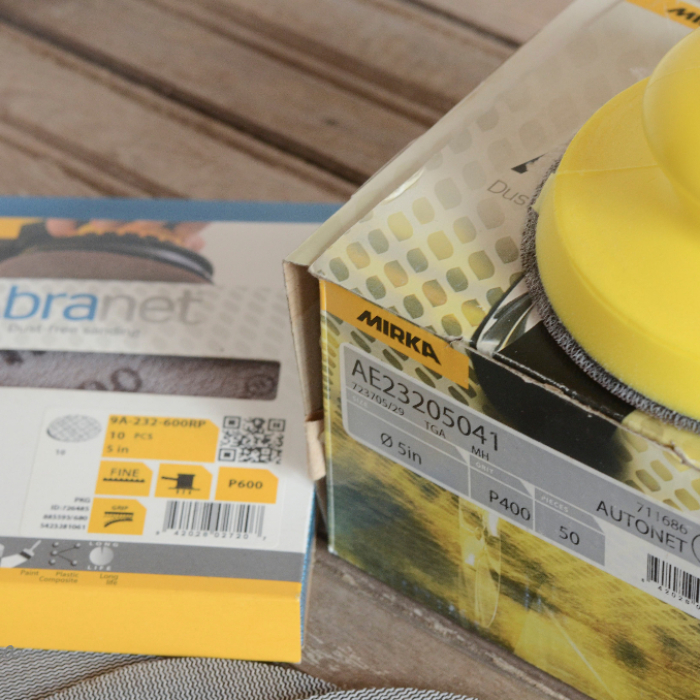
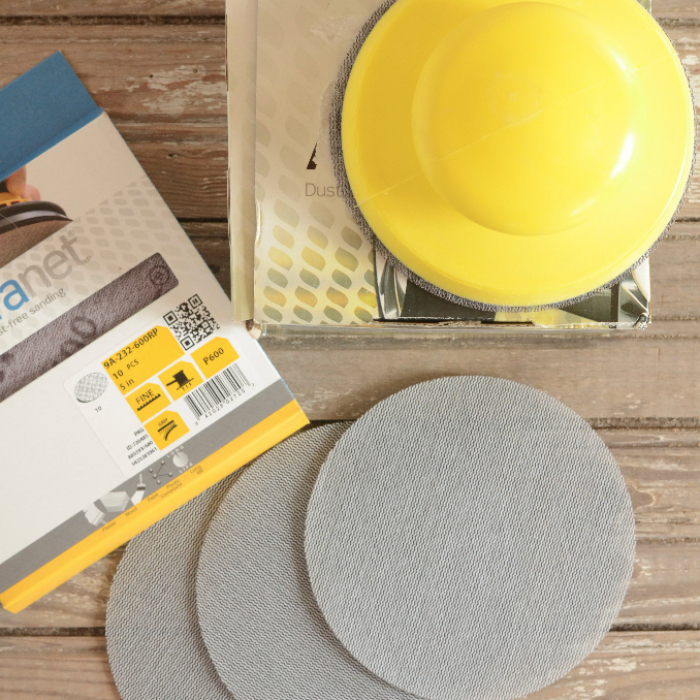
Mirka handsander (a recent investment: I hesitated at first because it was a bit spendy ($15 bucks, I think) but it feels really good in your hand.
Mirka Abralon Autonet (technically Autonet is for cars, but in reading online there’s little difference in feel or application AND I got a screaming deal on a box at my local tool store!)and Abranet mesh sanding discs (again, I hesitated because they’re not cheap, but I LOVE them! You can easily attach them to a standard orbital bottom or attach them to a tool as pictured above). Currently, I only have the 400 and 600 grits (for my next sanding adventure!) but plan to invest in some additional grits in the near future.
Bosch Orbital sander (someday I’d love to upgrade to a dustless orbital sander, like the Ceros, but for now I have an random orbital sander–she works :))
For additional reading/resources on sanding
Rules for Sanding Wood // Bob Flexner // Popular Woodworking Magazine
Preparation and Sanding: Begin with the End in Mind // General Finishes Blog
Sanding Tip For All Woodworkers: Sand The Sequence // Ask Woodman
Sanding Efficiency // The Wood Whisperer (this guy is one my favorites: funny and informative!)
Conclusions
Sanding isn’t my favorite woodworking task, but one that must be done for a flawless, durable finish.
Looking for more woodworking/furniture resources? Be sure to check out Furniture Files for additional information and resources on spraying furniture, using Bondo, and the like.
Happy woodworking, all!

2 Comments
Jennifer Cahill
June 13, 2016 at 12:59 PMGreat information and i love that you have added links for more info. I haven’t tried the mesh back discs yet and need to get on that! You are right about getting what you pay for. I foolishly bought some Harbor Freight sandpaper that was beyond worthless! One tip I’ve found that extends the life of sandpaper is using a stiff metal brush (usually used for furniture stripping – oversized toothbrush size) to brush off those potentially finish marring clumps that cling to the sandpaper’s surface. It helps prolong the life of the sandpaper for a few more passes.
Queen Patina
June 30, 2016 at 8:14 AMI LOVE the mesh discs, especially when paired with a vacuum/dust collection system and a good sander. The combination eliminates virtually all the dust!
Thanks for the tip on prolonging the life of the sandpaper! 🙂